Pentru a putea determina tipul unei placi de dezvoltare putem folosi o librarie special creata in acest scop.
Aceasta librarie se numeste Board Identify si se poate descarca de aici. Dupa descarcarea acestei librarii putem proceda la instalarea ei accesand meniul Schita > Incarcare biblioteca > Adaugare librarie.zip.
Dupa ce s-a instalat biblioteca putem deschide sketchul cu care vine ea ca exemplu accesand meniul Fisier > Exemple > Board Identify > Board Identify.
Sketchul este cel de mai jos:
/*
 *  Board_Identify.cpp
 *  Identify the microcontroller that the code has been compiled for.
 *  Created by Matt Fryer on 2017-10-04.
 *  Licensed under LGPL (free to modify and use as you wish)
 */

// Adding this line before the library is included will cause a warning in the compile output window containing the identified board
#define BOARD_IDENTIFY_WARNING
// If warnings still don't display, ensure "File->Preferences->compiler warnings" is set to "Default".
// Even doing this, some boards still won't display the warning in the compile window but the constants will still be created.

// Include the library
#include <Board_Identify.h>

void setup() {
    // Open the serial
    Serial.begin(9600);

    // Print the board information to the serial using the defined terms
    Serial.print(F("Board Type: "));
    Serial.println(BoardIdentify::type);
    Serial.print(F("Board Make: "));
    Serial.println(BoardIdentify::make);
    Serial.print(F("Board Model: "));
    Serial.println(BoardIdentify::model);
    Serial.print(F("Board MCU: "));
    Serial.println(BoardIdentify::mcu);
    // Board Indentify uses the namespace BoardIdentify to prevent variable name conflicts

    // BoardIdentofy::type is a unique integer that will never be changed and so should maintain future compatibility.
    // It is advised to use this for any logic such as:
    if (BoardIdentify::type == 4) {
        Serial.print(F("It is an Arduino Nano"));
    } else {
        Serial.print(F("It is NOT an Arduino Nano"));
    }
}

void loop() {

}
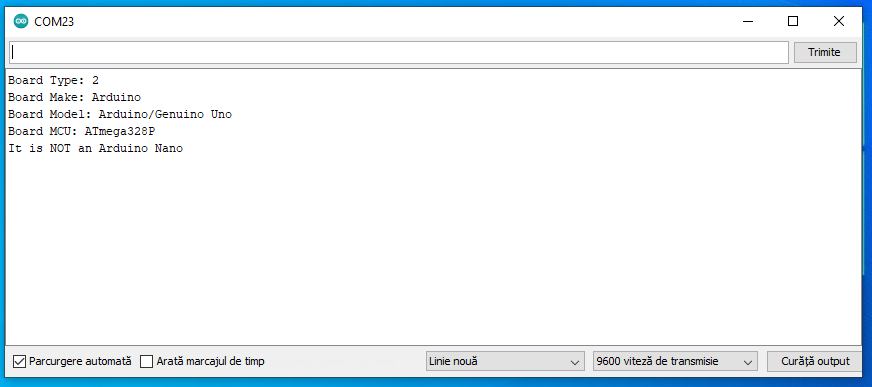
Dupa ce vom incarca sketchul in placa de dezvoltare si-l vom rula in Terminalul serial vom primi ca rezultat un exemplu precum cel de mai jos (sketchul fiind testat pe Arduino Uno):
